Python programming based on ArcGIS: Preface and original intention
Python has made great achievements in the development of ArcGIS because ArcGIS provides a site package ArcPy (introduced after 10.0). This site package encapsulates all the functions in ArcGIS into class libraries. As long as we import the Arcpy site package in python's editor, we can call the class library inside to achieve the functions we need.
Develop corresponding functions according to your own needs, because it is really inflexible to simply operate desktop tools to solve our needs. If you are asked to process a piece of data with the desktop version, you may think that it doesn't matter. It's just a matter of minutes; How about a hundred? You may say that it was just one day; How about a thousand? How about ten thousand The high cost of time is a problem. In addition, if the workload is large and repetitive, it will be very annoying later.
So, instead of spending a lot of time on repetitive and boring work, it's better to use these time to learn python (life is short, I use python). Through ArcGIS+python development, we can solve this problem very well. Just one program can let the computer help us process data in batches (if you are good enough), which is a wonderful thing, but the premise is that you can program. The ideal is very good, to reach that stage, we must continue to work hard.
If you want to do a good job, you must first use your tools. The choice of editor is also relatively important for programming. Now let's briefly talk about the development methods of ArcGIS+python, which are mainly divided into the following three types:
1.Write python-related code on the editor included in ArcGIS desktop version: open the desktop version software → click "python window" on the toolbar (as shown in the red box) → write relevant code in the python window (as shown in Figure 1) (this is not recommended)
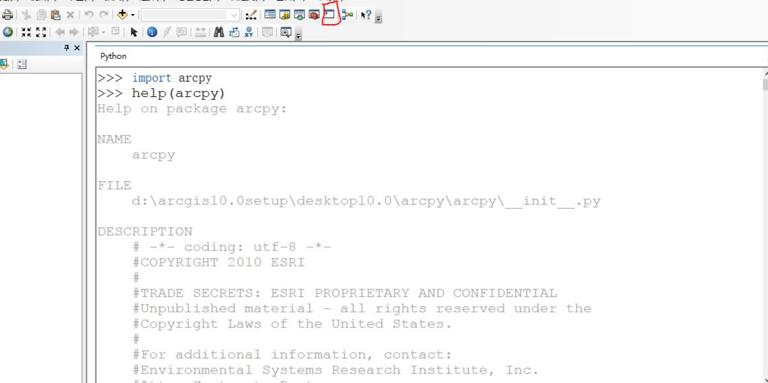
Figure 1
2.Through ArcGIS Desktop python add-in (introduced in 10.1): The python add-in is specially used to make Arcgis plug-ins. Add-in (add-in) needs to be downloaded to the local computer on the official website of Esri (as shown in Figure 2). It does not need to be installed. After downloading and decompressing, find addin in the bin folder_ The assistant.exe application can be run directly, and then set the relevant parameters and function codes. (See Figure 3)
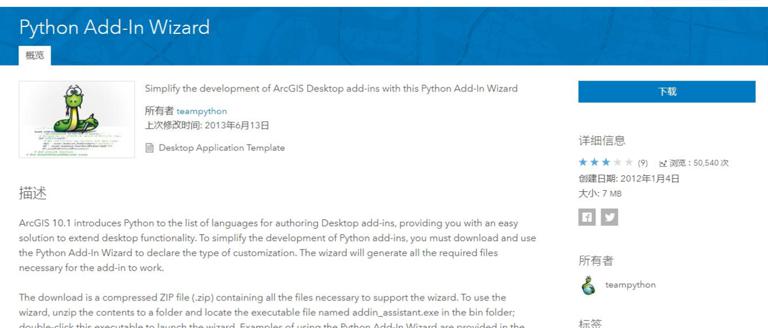
Figure 2
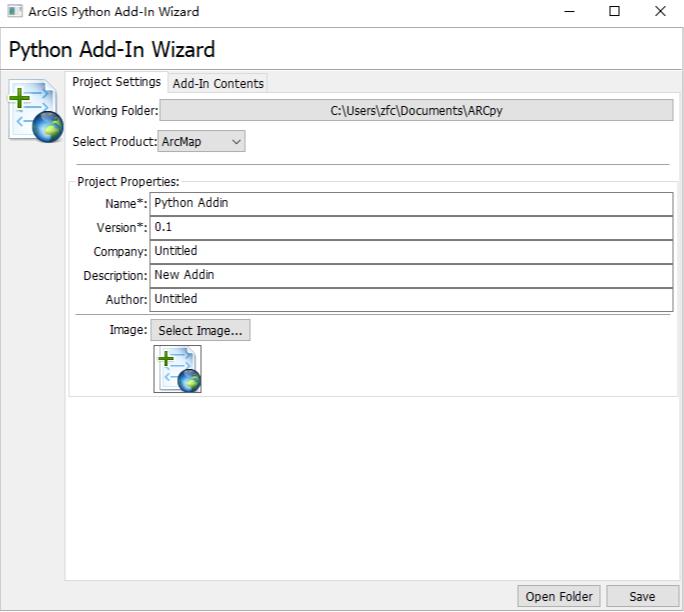
Figure 3
3.Write python code in the editor provided by python or other third-party editors.
During the installation of Arcgis, the corresponding python has been bound and installed, so there is no need to reinstall python.
Click Start → find the Arcgis folder in all programs → click "IDLE (Python GUI)" to open the shell window of the python editor (the information related to the python version displayed on the page) → click File → New Windows in the menu bar → open the Untitled window, and write the python-related code in this window → click Run -- RunModule (F5) in the menu bar after the code is completed to display the running results of the code in the shell window; (As shown in Figure 4)
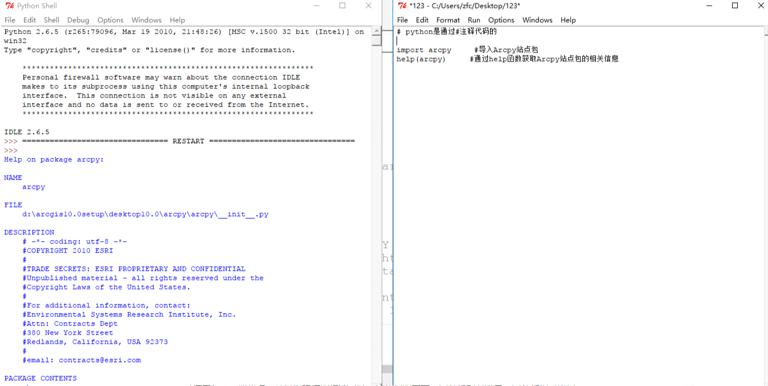
Figure 4
Third-party editor: pychar (highly recommended).
Pycharm is a user-friendly editor that provides powerful completion functions. It doesn't need us to memorize how to spell each word. It can also set the interface according to our own preferences (it can be dazzling, but will not be described here). What's more, the editor is very interactive. It can run while typing code. The running results can be seen at the bottom of the window at any time, which is convenient for us to modify the code at any time according to the running results. Pycharm's installation package can be downloaded from the official website. It is divided into community version (free) and professional version (paid). Generally speaking, the functions provided by the community version have met our needs. The installation is also relatively simple. You can install the tutorial by yourself.
After downloading and installing, open pychart → click File in the menu bar → select New Project (as shown in Figure 5) → set the folder where the project is saved and the version of python (as shown in Figure 6) → click the create button to create the project.
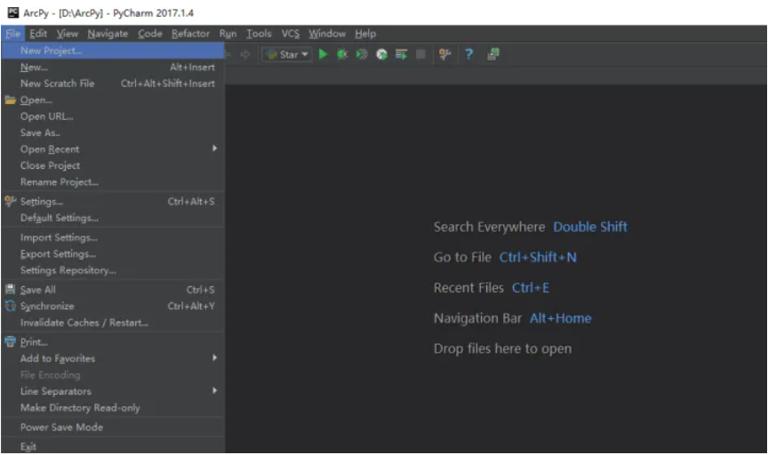
Figure 5
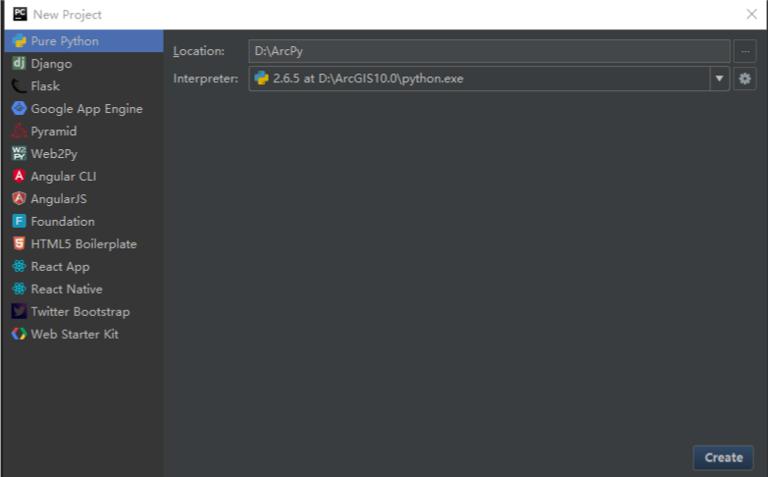
Figure 6
On the right side of the window, you can see the project Arcpy we just created. Right click the project Arcpy → select New → select python File → enter the file name to create a new python file (as shown in Figure 7) → write the code in the file (as shown in Figure 8)
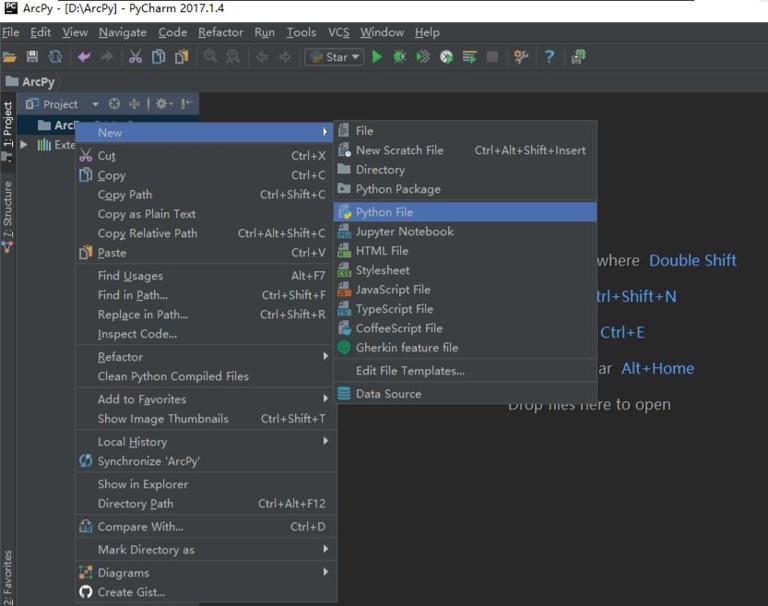
Figure 7
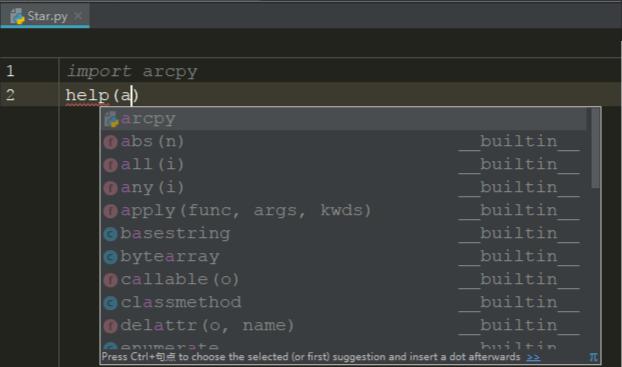
Figure 8
After running the program, you can see the output results at the bottom of the window (as shown in Figure 9)
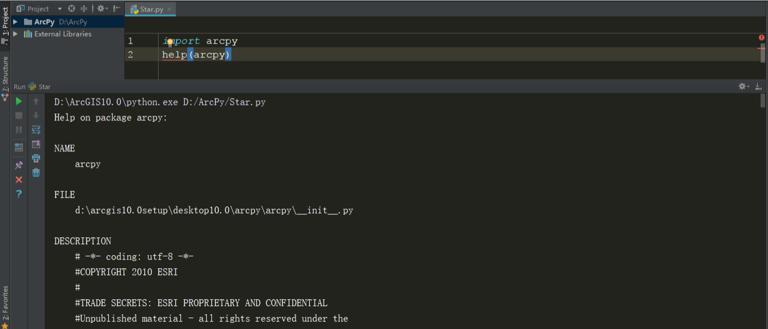
Figure 9