Vue-router: realize pure front-end multi-page application (Vuecli+Element UI)
1.Brief introduction
1.1Why use Vue-router

To create a simple web page with a navigation bar, the content of the page can be switched with the click of the navigation bar. The first idea is to use the webpack to package several pages, and then add links to the buttons on each page. However, in this way, each page needs to be refreshed. There is a big problem in efficiency, and the navigation bar will also be refreshed after the user clicks it. The experience is not good. Therefore, Vue router in Vue is very suitable for this simple multi page application.
1.2 Two Modes of Vue router
When vue router implements single page front-end routing, it provides two modes: Hash mode and History mode. The default mode is Hash mode.
1.2.1 hash mode
The hash mode uses hash to implement non refresh routing. The url hash is similar to: http://www.xxx.com/#/login 。 "#" is followed by a hash value. This url does not cause the browser to send a request to the server. If the browser does not send a request, the page will not be refreshed. Each time the hash value changes, the hashchange event will be triggered. Through this event, js can know what changes have occurred to the hash value. Therefore, you can update part of the page by listening to hashchange.
1.2.2 history mode
HTML5 has two more APIs, pushState and replaceState, through which you can change the URL address without sending a request. There is also a popstate event. You can use these to implement front-end routing in another way, but the principle is the same as that of hash. With the implementation of HTML5, the URL of single page routing will not add a #, which is more beautiful. However, because there is no # sign, the browser will still send a request to the server when users refresh the page and other operations. To avoid this, the server needs to redirect all routes to the root page in the history mode.
2.Use of Vue-router
2.1 Installation
2.1.1 Download/CDN import
Download address: https://unpkg.com/vue-router/dist/vue-router.js. CDN incoming address: https://unpkg.com/vue-router@2.0.0/dist/vue-router.js.
Then introduce the following in the html page:
<script src="/path/to/vue.js"></script>
<script src="/path/to/vue-router.js"></script>
2.1.2 npm installation
Terminal input:
Npm install vue-router
If you use it in a modular project, you must explicitly install the routing function through Vue.use().
Import Vue from 'vue'
Import VueRouter from 'vue-router'

Vue.use (VueRouter)
})
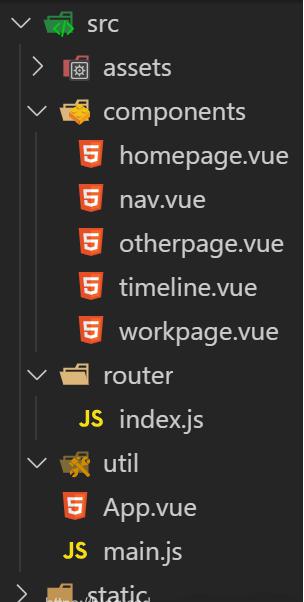
Create a router folder under src, create index.js in it, write the contents above, and then import the components under./router in main.js, which is convenient for management.
Import App from'. / App'
Import router from'. / router'

/* eslint-disable no-new * /
New Vue ({
El:'# app'
Router
Render: h = > h (App)
})
})
2.2 Implementation
2.2.1 Routing Configuration
Configure/router/index Js. After introducing router and required components (the content to be displayed on each page), define route. It is an object and consists of two parts: path and component Path refers to the path, and component refers to the component. For example: {path: '/home', component: home}
Export default new Router ({
Routes: [
{
Path:'/ homepage'
Component: homepage
}
{
Path:'/ workpage'
Component: workpage
}
{
Path:'/ otherpage'
Component: otherpage
}
/ / redirect
{
Path:'/
Redirect:'/ homepage'
}
]
})
Here I define three route, each corresponding to a component.
2.2.2 Page implementation
In vue router, it defines two tag sums to correspond to the click and display parts. It is to define the part clicked in the page and the display part. It is to define where the regional configuration content will be displayed after clicking. So there is also a very important attribute to define where to go after clicking, such as Home. In vue cli, I put routerview on the main component of the app to standardize the area of the displayed content
<template>
<div id="app">
<el-container>
<el-header>
<div>
<Nav></Nav>
</div>
</el-header>
</el-container>
< router-view > < / router-view > / / the display area is under Nav
</div>
</template>
If you want to write your own Nav, just wrap the router-link tag in the div of the button. What I use here is the Nav component in the Element framework, with the router method. Open router in the tab, and then add the index attribute to the button below The routing function can be completed. The Nav components are as follows:
<template>
<el-menu :default-active="activeIndex" class="el-menu-demo" mode="horizontal" :router="true" @select="handleSelect">
<el-menu-item index="homepage">首页</el-menu-item>
<el-menu-item index="workpage">工作</el-menu-item>
<el-menu-item index="otherpage">作品</el-menu-item>
</el-menu>
</template>
Finally, we can click the button in Nav on the main page of app.vue to successfully display the different components. This is my directory structure:
The project code is uploaded to Github: https://github.com/Px956678784/Little-Planet.